
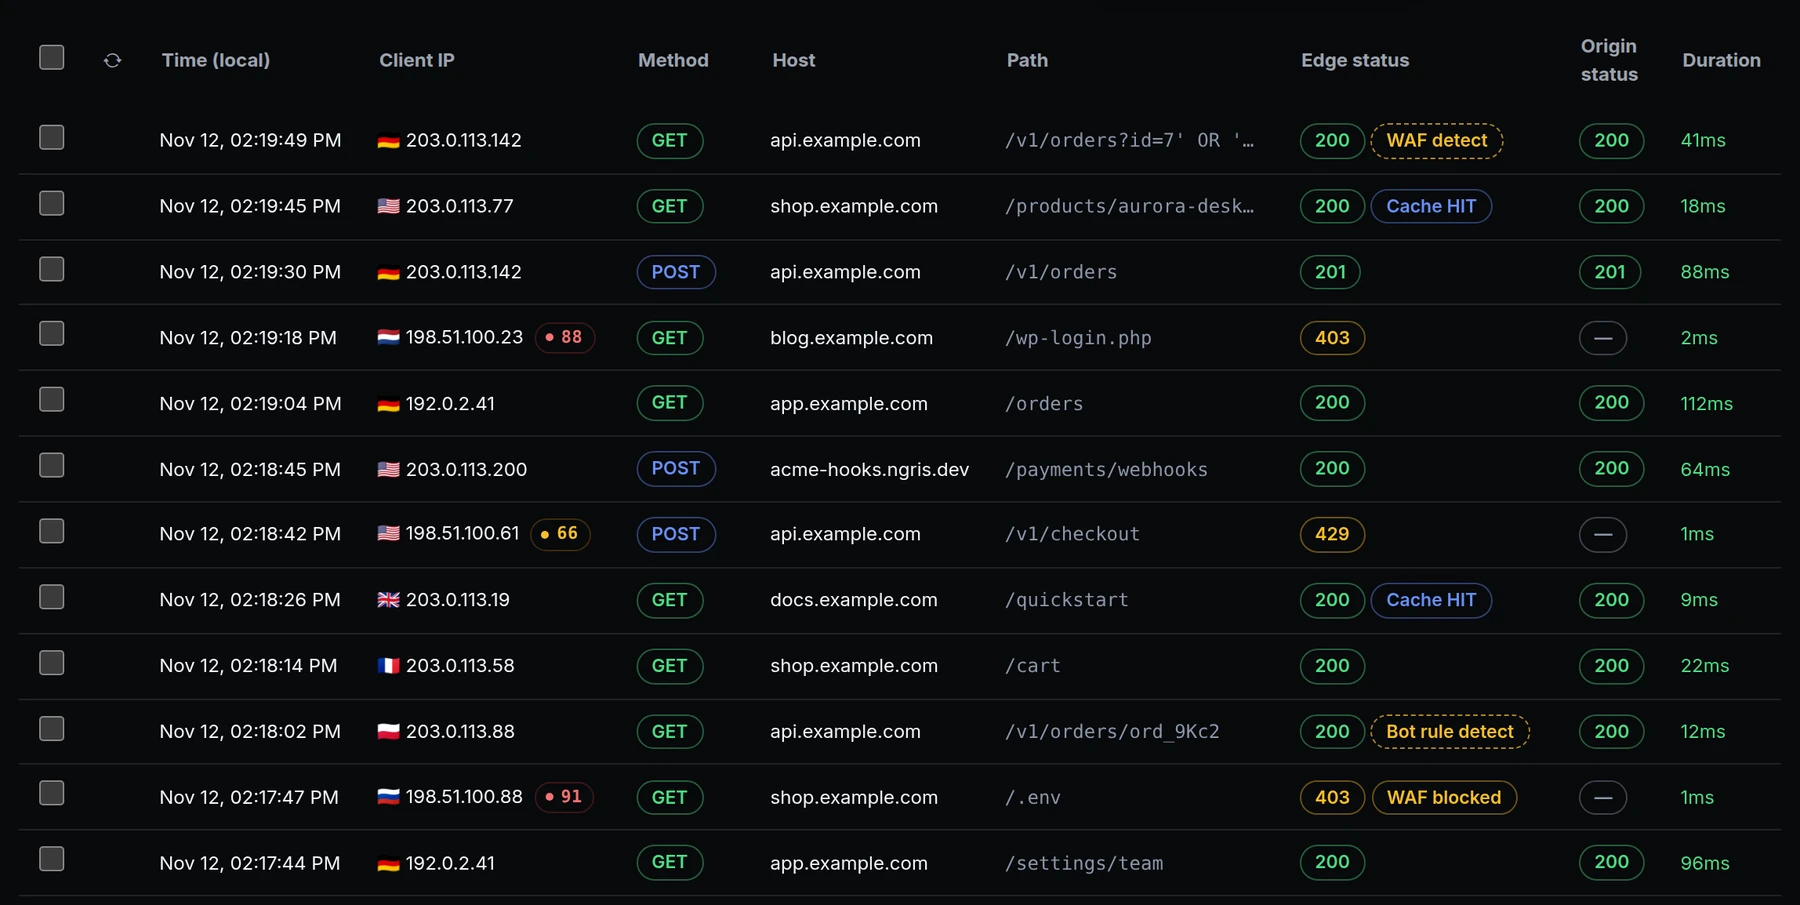
You put a WAF or bot rule in detect mode to see what it would stop before it stops anything. Until now that was hard to see: in the Traffic Inspector, a request the rule matched looked like every other request, and the rule didn't say how often it had matched.
Now a request that a WAF or bot-management rule matched carries a tag, whether the rule refused it or only watched. Above is Acme Labs' traffic: an order lookup with an SQL injection in a parameter went through with the tag WAF detect, and a request for /.env was refused with WAF blocked.
What changed
- A tag on each matched request. WAF detect or Bot rule detect when the rule is in detect mode and the request went on. WAF blocked or Bot rule blocked when the rule refused it.
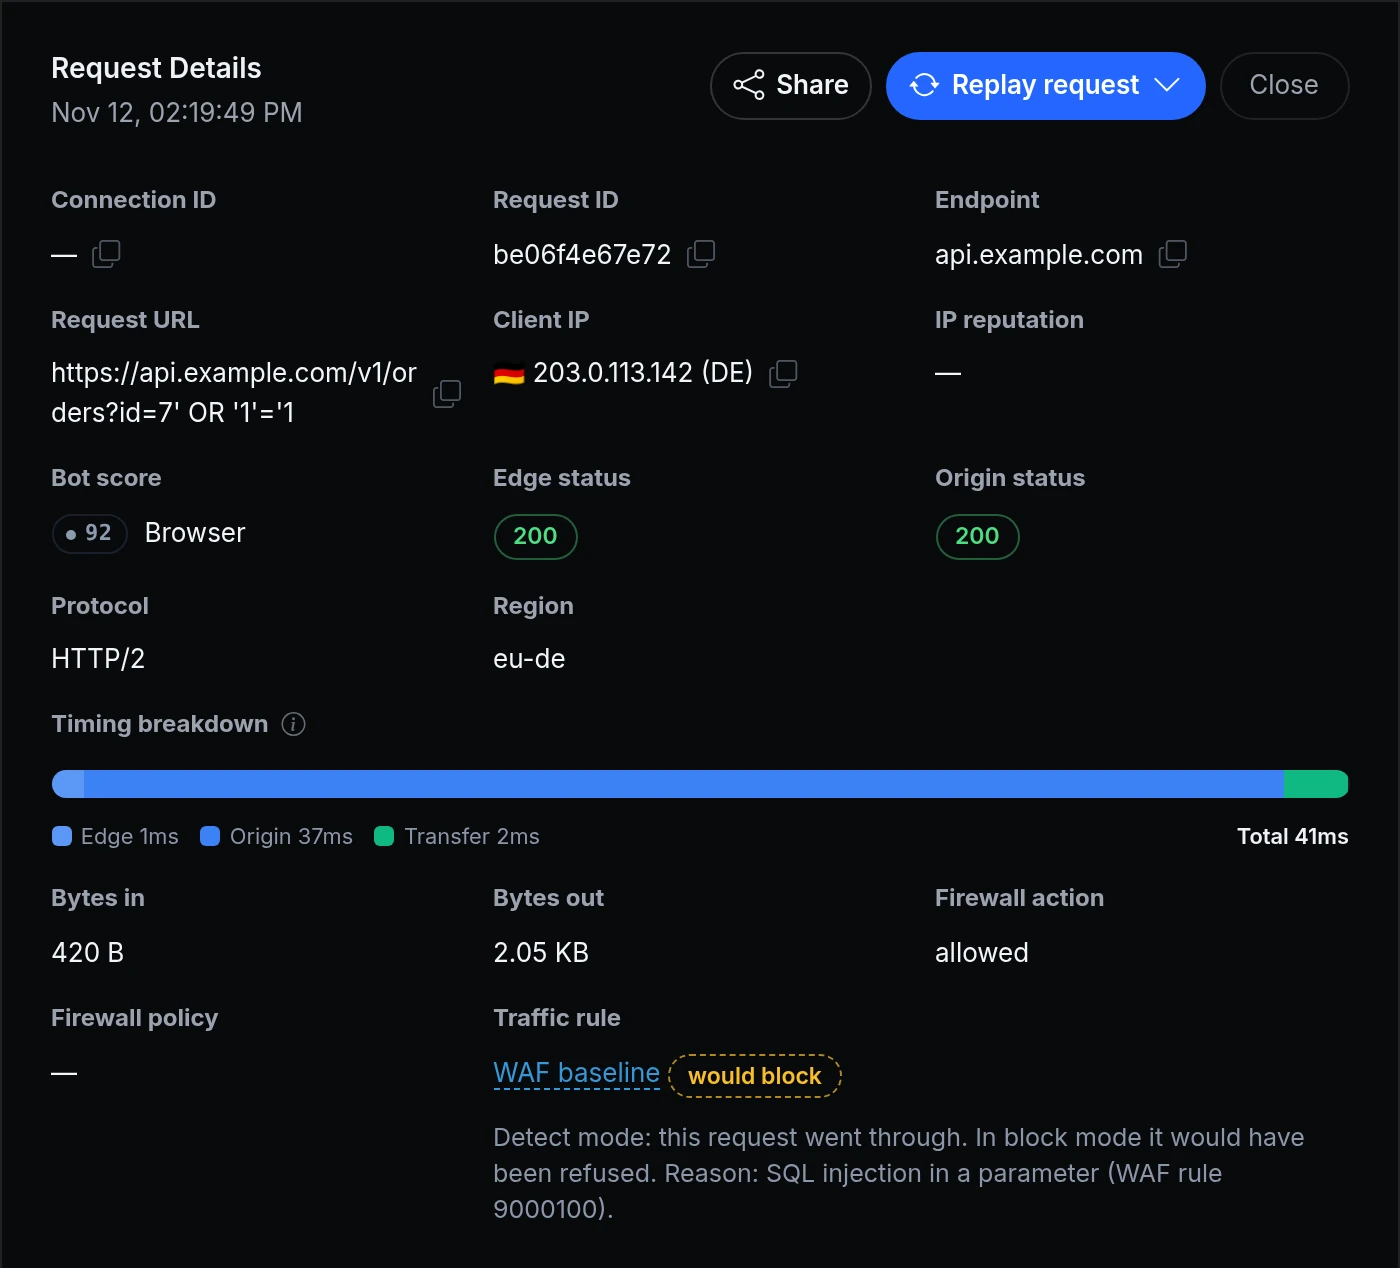
- The rule and the reason. A request's details have a Traffic rule line with the rule's name and why it matched, such as "SQL injection in a parameter" or "TLS fingerprint (JA3) on the rule's denylist".
- A filter for them. The Traffic rule filter keeps the requests matched in detect mode, the blocked ones, or both.
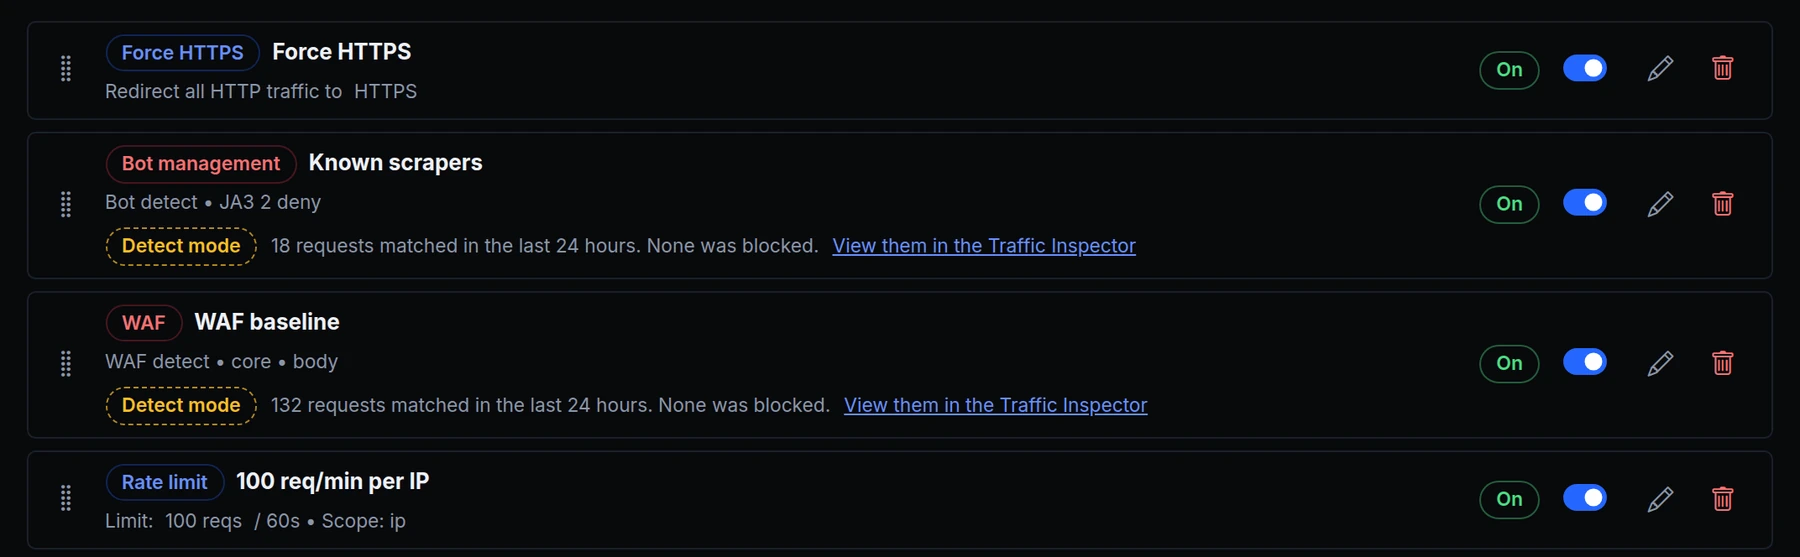
- A count on each rule. On an endpoint's Traffic Policy tab, each WAF and bot-management rule shows how many requests it matched in the last 24 hours, with a link to those requests. The counts are updated every 15 minutes.
- In the API. List Traffic Logs returns a
traffic_rulefield and takes the same filters.
Requests from before this change carry no tag.
Get started
- On an endpoint's Traffic Policy tab, put a WAF or bot-management rule in detect mode.
- Open Observability › Traffic Inspector, add a filter on Traffic rule and pick Matched in detect mode.
- Click a request to read the rule and the reason.
- When the rule matches what you want stopped and nothing else, switch it to block.
- Read the docs: Which rule matched.